In early 2023, Google will be sunsetting Universal Analytics (UA) and forcing advertisers to move to Google Analytics 4 (GA4). As GA4 data will not be historic (i.e. you will not be able to access data from before the time of setup), it is imperative to start tracking as soon as you can.
Transferring your existing UA setup into GA4 is not as straightforward as advertisers would hope. To help ensure you're capturing all of those vital page views and events, we've prepared a step by step guide to help you transfer your Analytics set up from UA into GA4. Whilst creating a new GA4 property and navigating it is pretty intuitive, it's worth making sure that you are tracking and reporting accurately on your KPIs.
Key Differences between Universal Analytics and GA4
The main difference between the two versions of Google Analytics is the way in which data is collected. Whereas the Google Measurement Protocol was used in Universal Analytics (UA) to track hits, events and ecommerce actions, GA4 only uses events to track user activity. One of the benefits of this change is that you can now segment at an event level, on top of session and user segments. This makes it easier to single out events on specific locations, be it in app or on site.
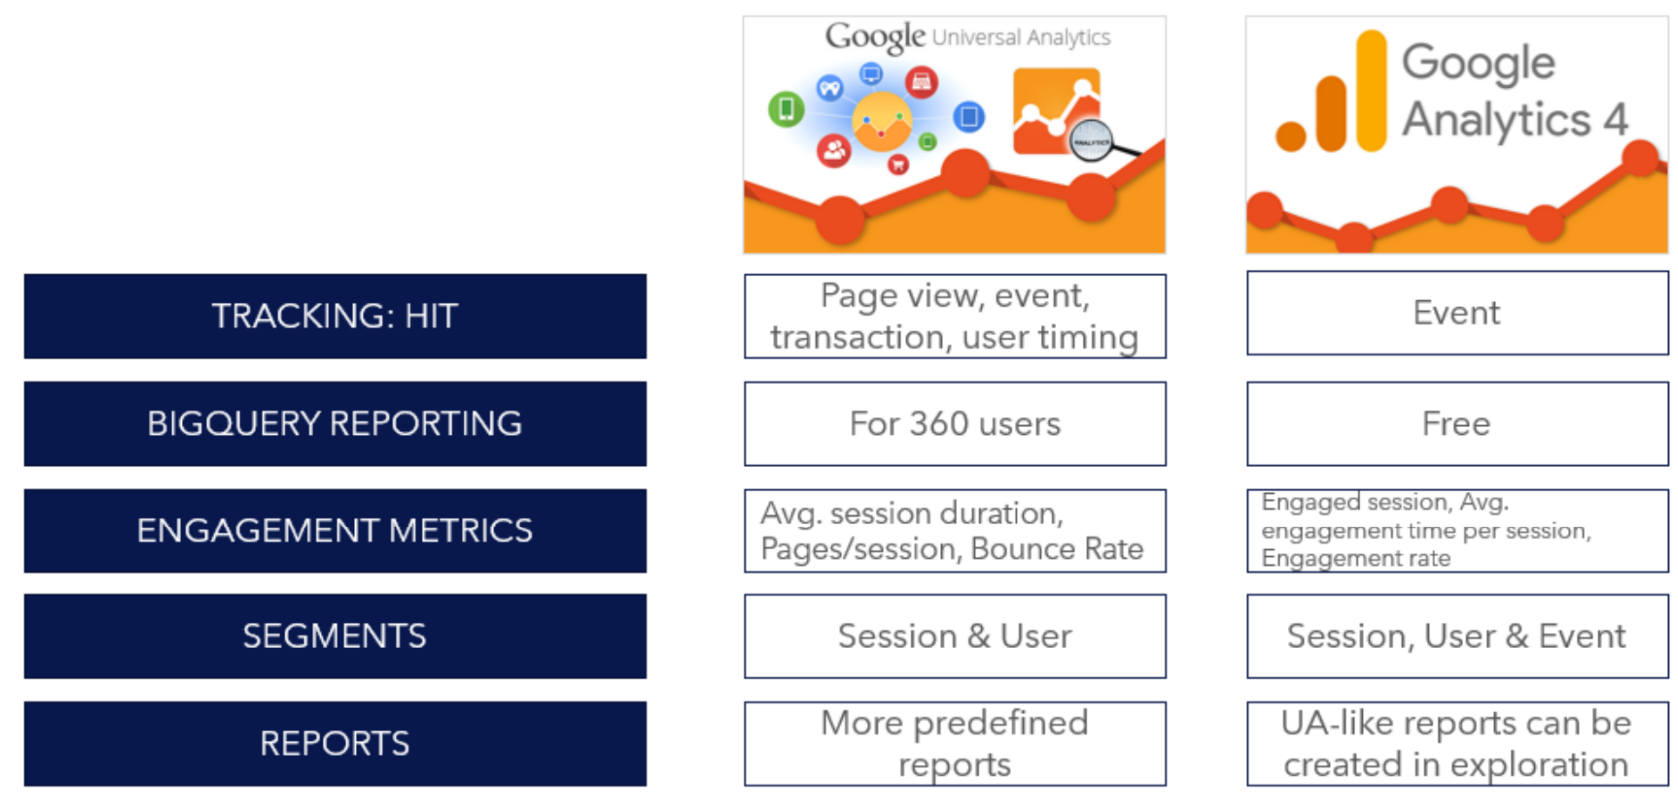
Other differences worth noting are out-the-box engagement metrics. An engaged session is characterised as a session which:
- Is longer than 10 seconds
- Includes a conversion event
- Has at least 2 pageviews within the same session
Another great perk for GA4 users is that BigQuery reporting is bunbled within. This was previously only included with the premium-priced Google Analytics 360 suite.
Setting up GA4
Step 1: Sign into your Analytics account
Assuming you have an existing Universal Analytics account, you just need to log in. GA4 is an additional property, but all your account information will stay the same, such as user permissions and billing information.
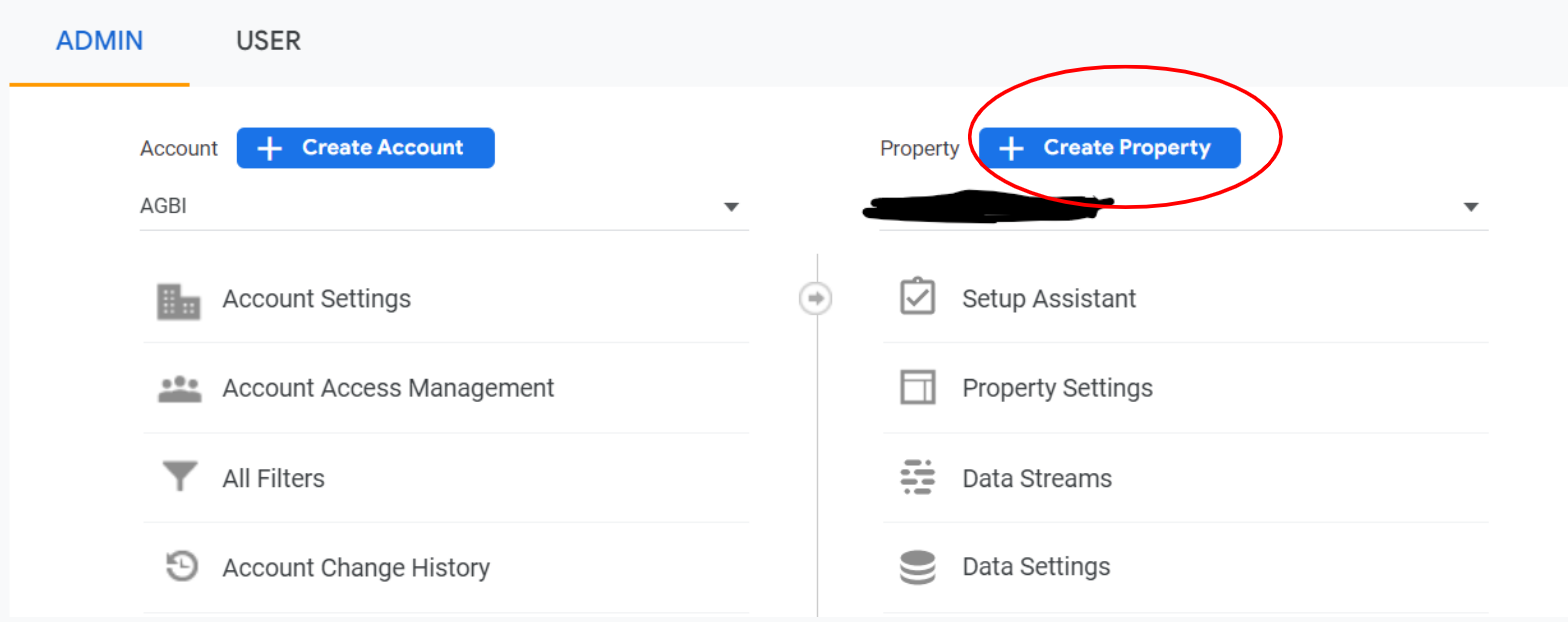
Step 2: Create a new property
To get started with GA4, you need to create a new property under your main account. Unlike UA, views are not (currently) a feature of GA4, so you will only need this one property.
Step 3: Add your details
Next, add standard details such as currency, time zone, and grant appropriate users' access.
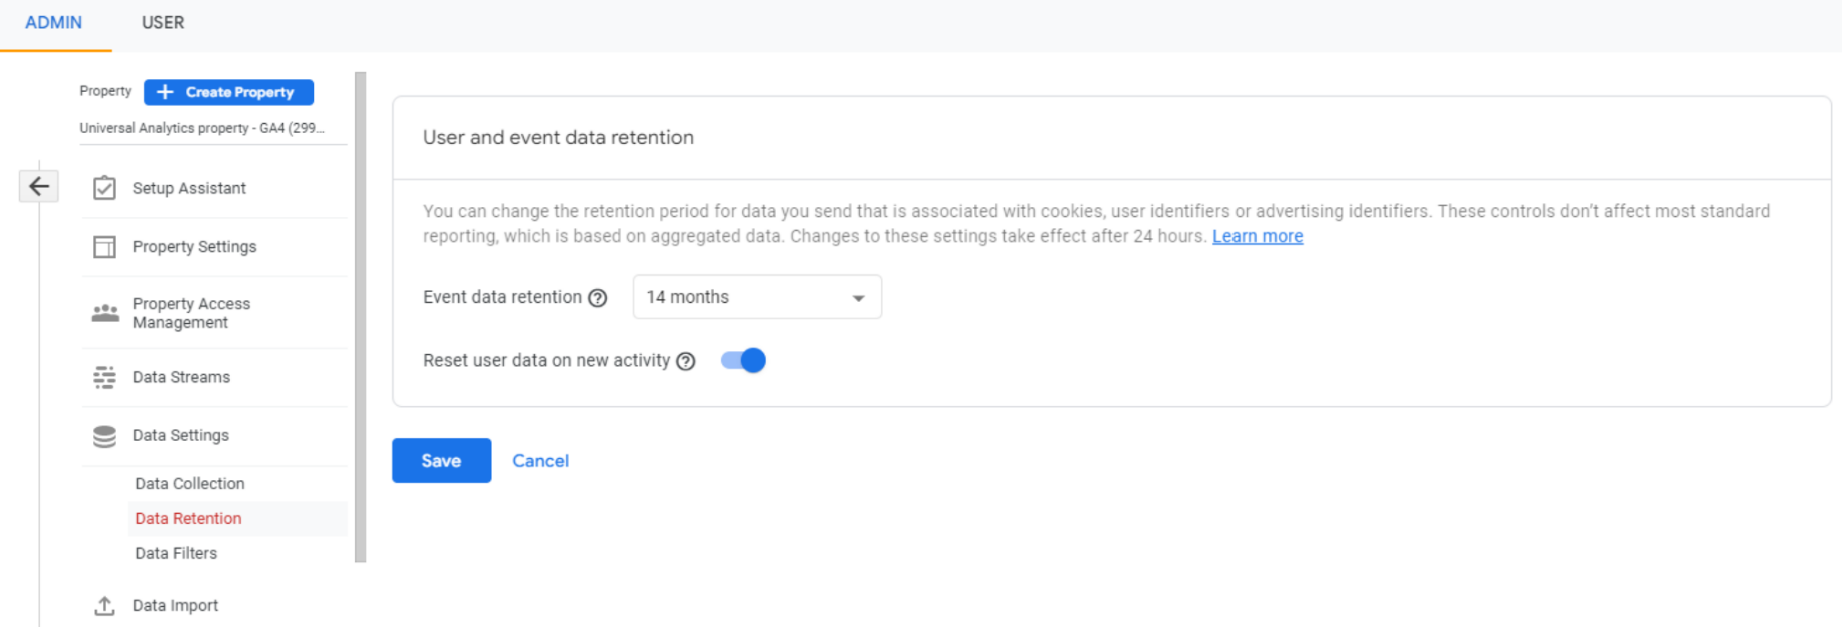
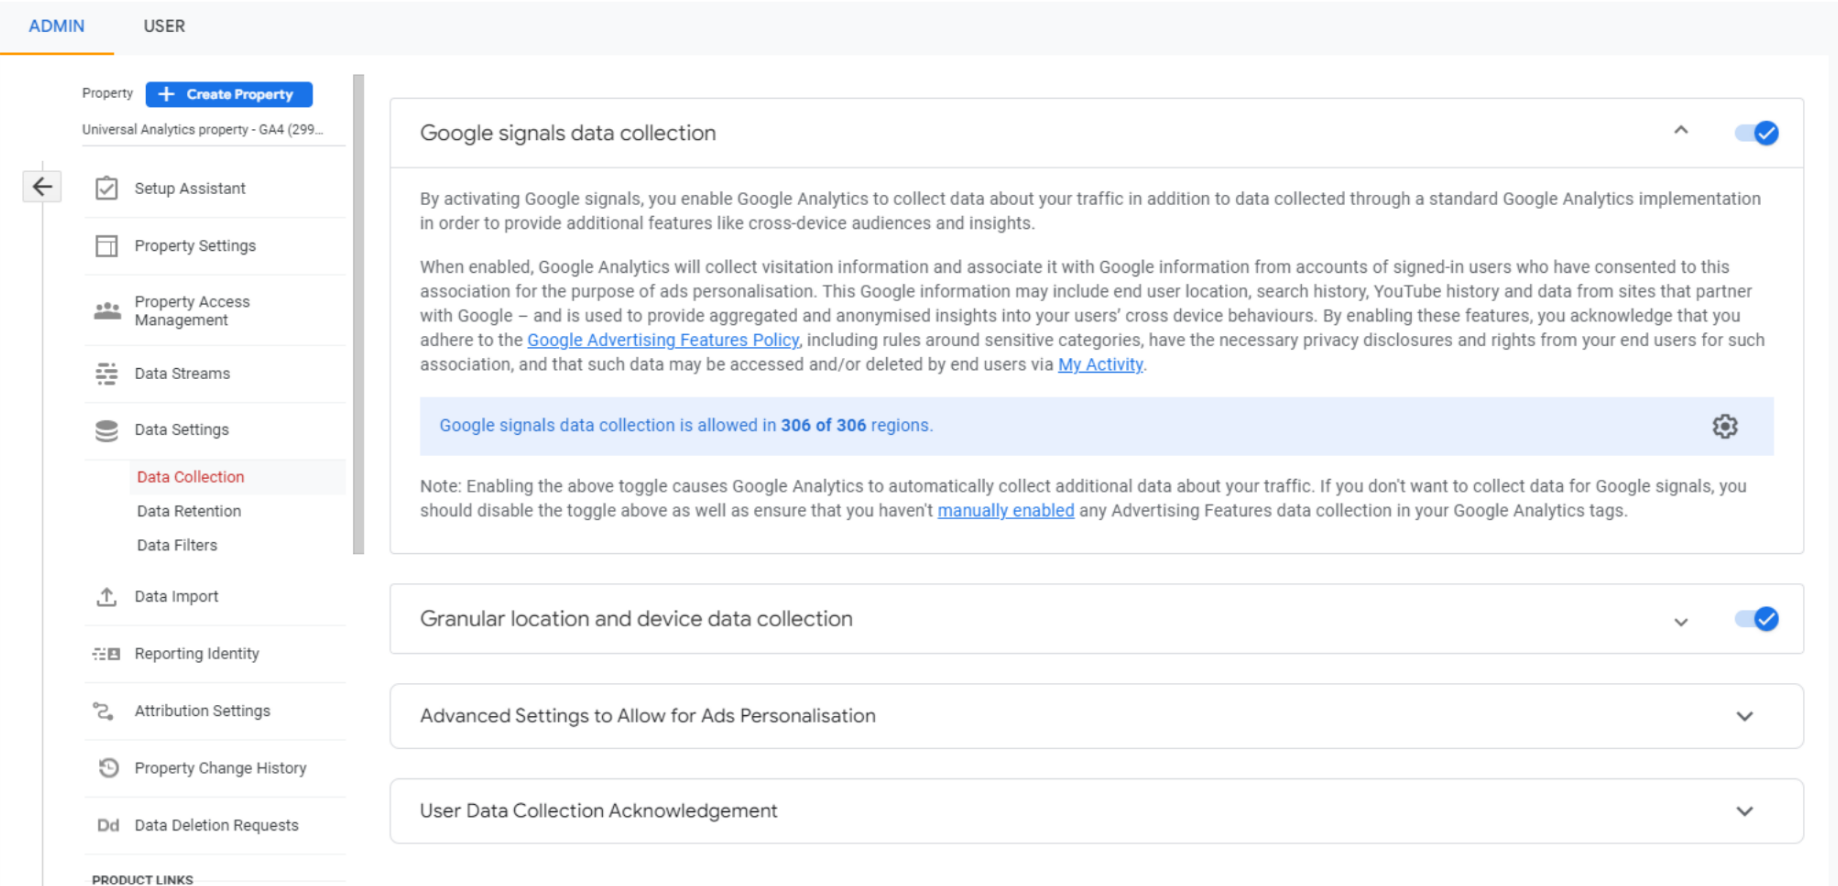
Step 4: Adjust your data retention period
Bizarrely, the default GA4 data retention period is a mere two months. You will want to change the data retention period to 14 months ASAP to retain your data for as long as possible. This can be done within the Data Settings menu.
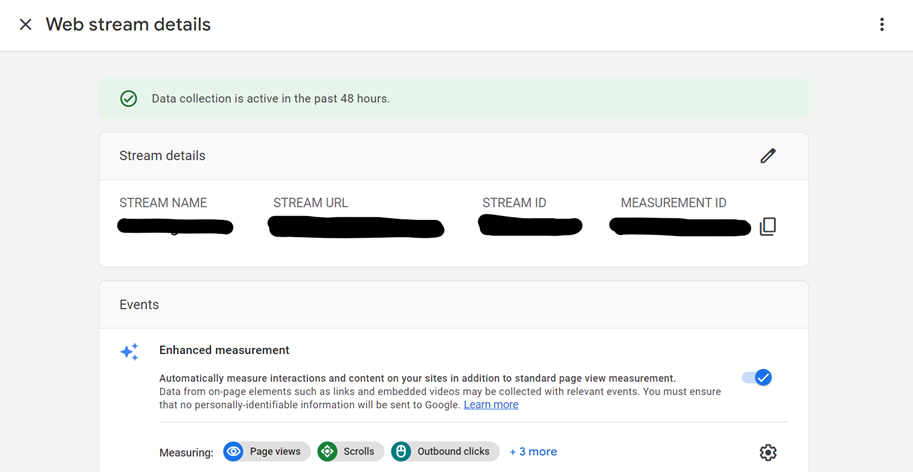
Step 5: Add a Data Stream
So it's worth getting it right the first time. There is a Data Streams tab on the Property Settings view:

Here you can add multiple data streams, including apps – which is a new feature to GA4 that enables better integration between app and web activity, a core selling-point of this new product.
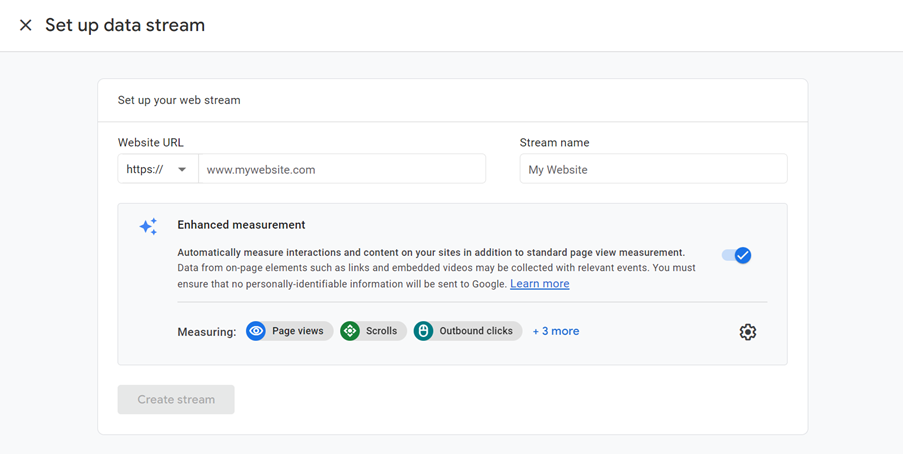
Once this is done, a Measurement ID is created. This will come handy in the next section: setting up tracking for GA4.
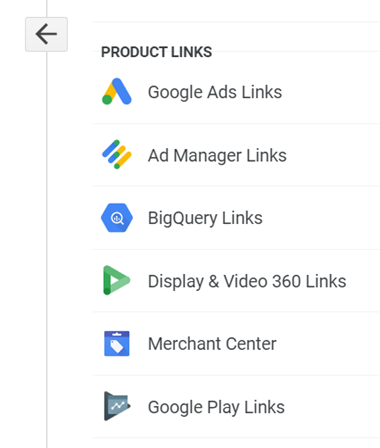
Step 6: Add relevant platform links
Whilst you're in the Settings view, you can also connect relevant platforms such as Google Ads, BigQuery or Search Console to your new GA4 property. This will integrate your systems for better reporting accuracy.
Tracking in GA4
Step 7: Check your Tag setup
Alternatively, most CMSs also have it integrated. Read Google's guidance here.
However, this does not mean that your Universal Analytics tags will work for GA4. The next section outlines how to get start collecting data in GA4 with Google Tag Manager. We strongly recommend keeping your original Universal Analytics tags to continue collecting data whilst migrating.
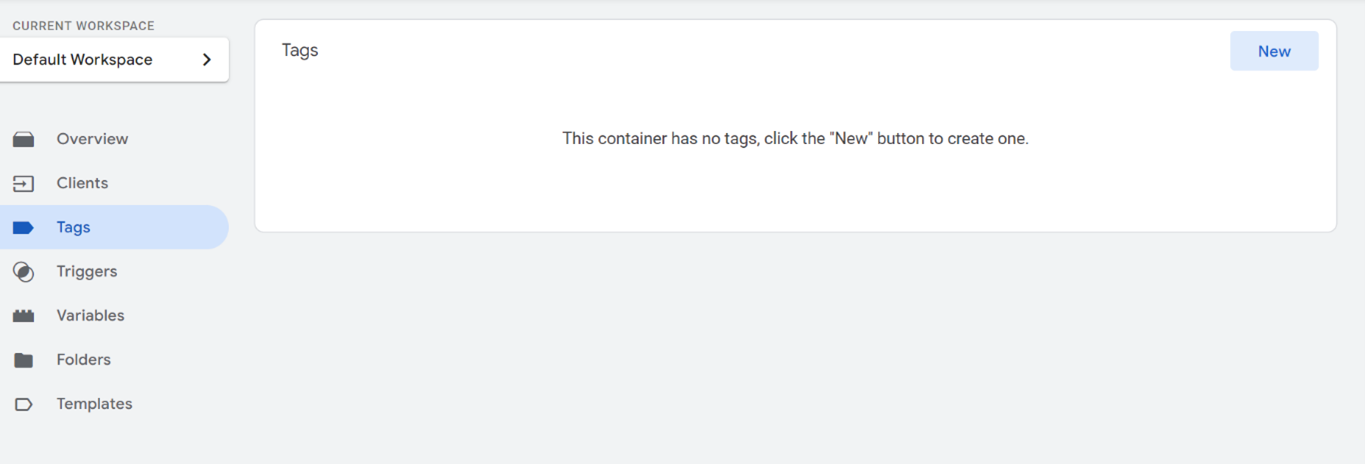
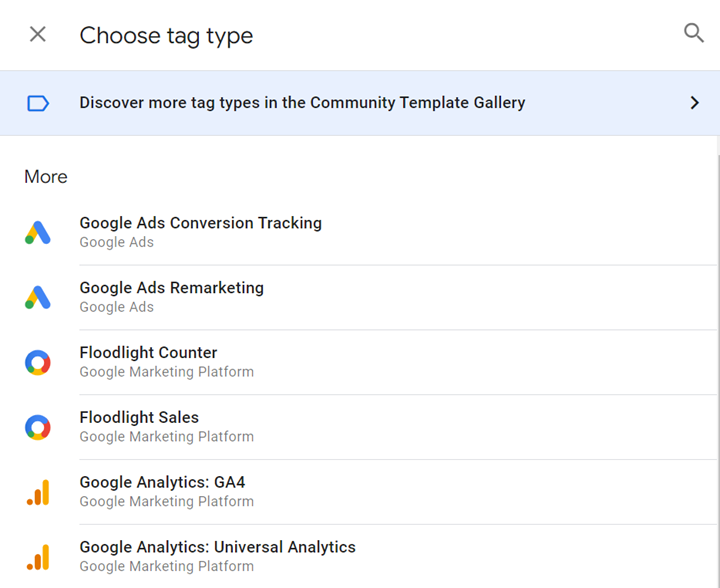
Step 8: Use GTM to create a new GA4 tag
The easiest way to start tracking your website data in GA4 is through the use of Google Tag Manager. If you already have a GTM account, you just need to create a new tag – make sure you select the GA4 Configuration tag type:
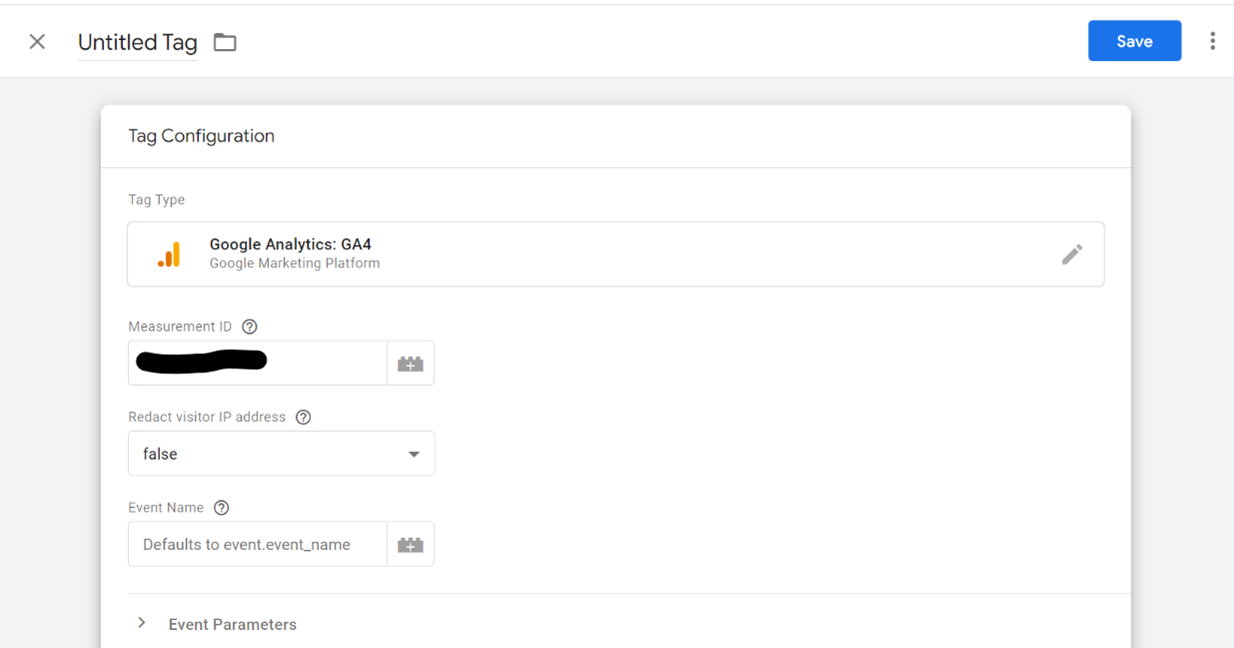
In the tag configuration tab, you will be asked to add the Measurement ID generated in your Analytics Data Stream (step 4). This will now link your website data to your GA4 console. We recommend adding 'All Pages' as a trigger, meaning the new GA4 configuration will fire on all your website pages. This tag will now automatically track all 'Enhanced measurement' events alongside pageviews.
Step 9: Import Google Ads conversions as events in Google Analytics 4
Make sure Google Signals is turned on, and that GAds is linked in your GA4 settings:
In Google Ads, select Tools & Settings, and then select Conversions. Add a new conversion action, and then import from GA4:
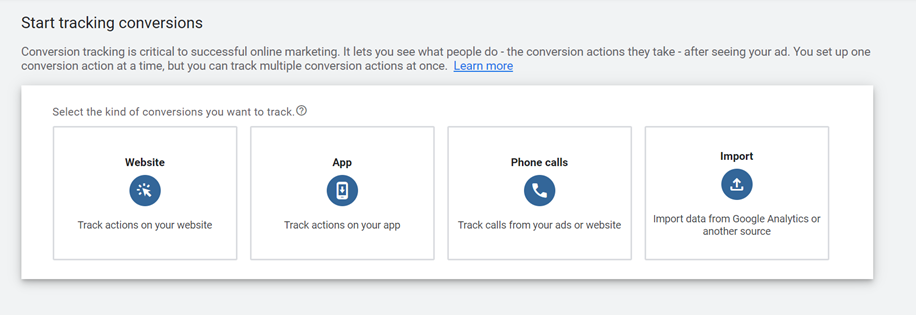
This will now add all conversion events you have been tracking through GAds previously as new events in GA4.
Reporting from Google Analytic 4
Once you've made sure your new GA4 property is set up and tracking data accurately, it's time to ensure your reporting is also adjusted to fit these changes.
Step 10: Map out changes in the setup
The first step is to ensure all KPIs can be replicated in GA4. Due to the new focus on event-based data collection, what we were previously reporting as hits need to have an event equivalent in GA4. Likewise, Goals need to be mapped out as Conversions previously were.
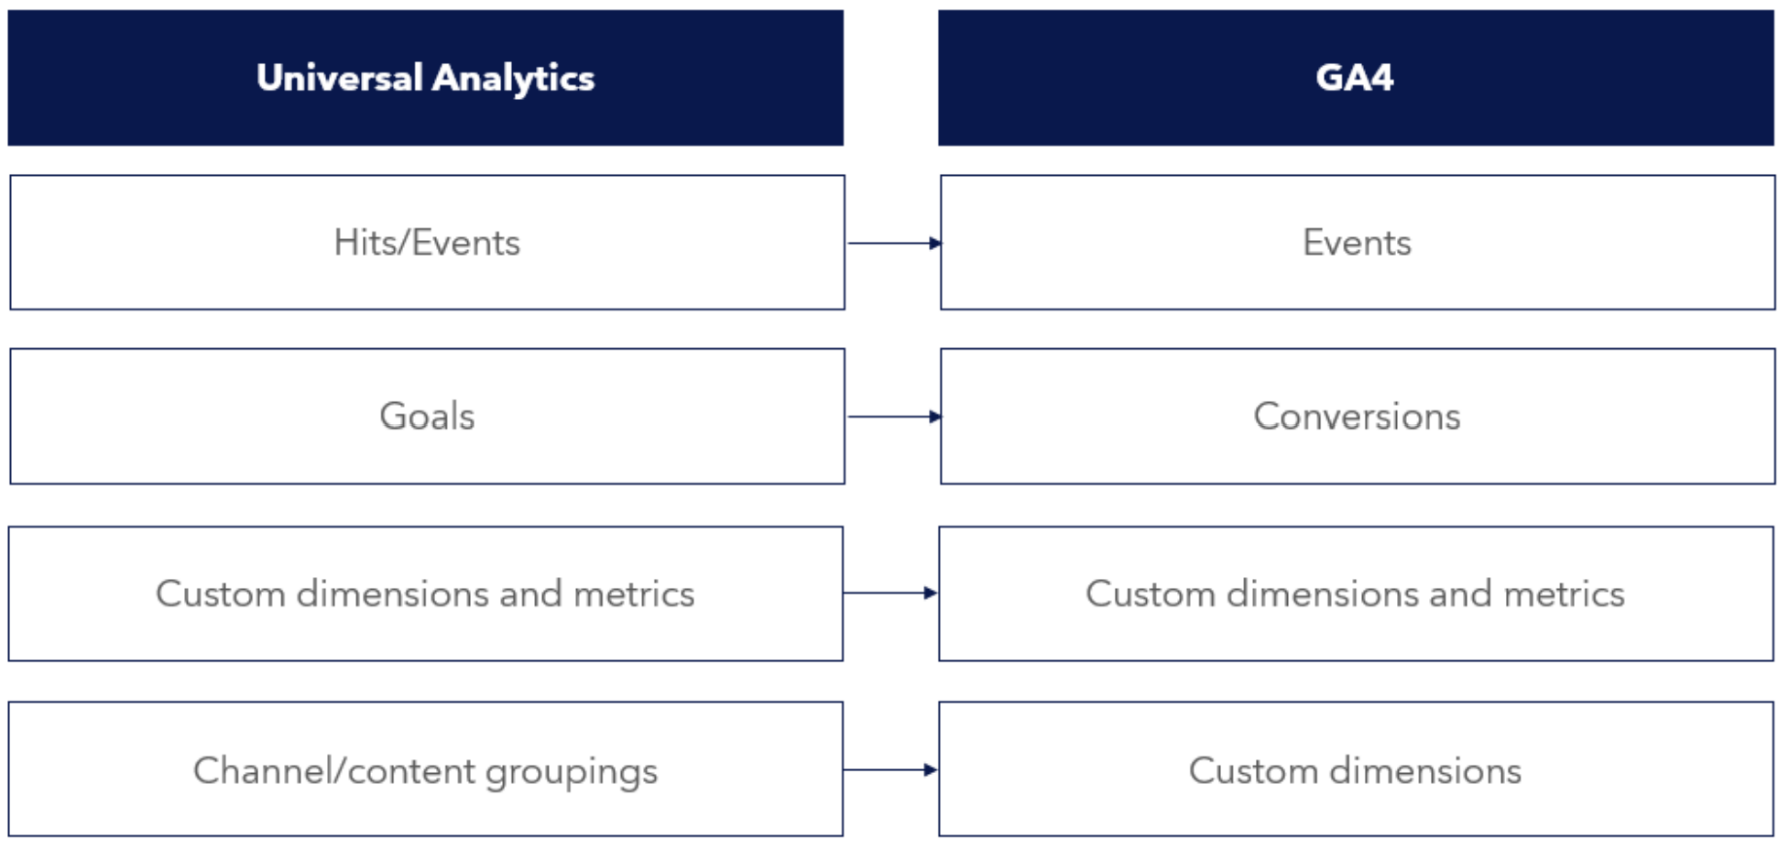
We would recommend mapping all of these using a table such as our template below to track these changes:

Google Analytics 4 Setup is straightforward, but time consuming
Transferring your existing Universal Analytics setup to Google Analytics 4 will not be a quick task for most of us. The steps required to do so depend on your existing setup, but by following this checklist point-by-point, you will be in a solid position to begin modifying your setup with the new suite of options provided by the new platform. Google is regularly improving GA4 to suit the needs of marketers in a post-GDPR, cookieless world and we're excited to see this product expand over the next several years.
Evelyn Staicu, Performance Marketing Executive
Need more support setting up your new Google Analytics 4 instances? Get in touch – we'd love to help.
Talk to us